Summer time and sprinklers….and blue goggles. Doesn’t get much better than that.


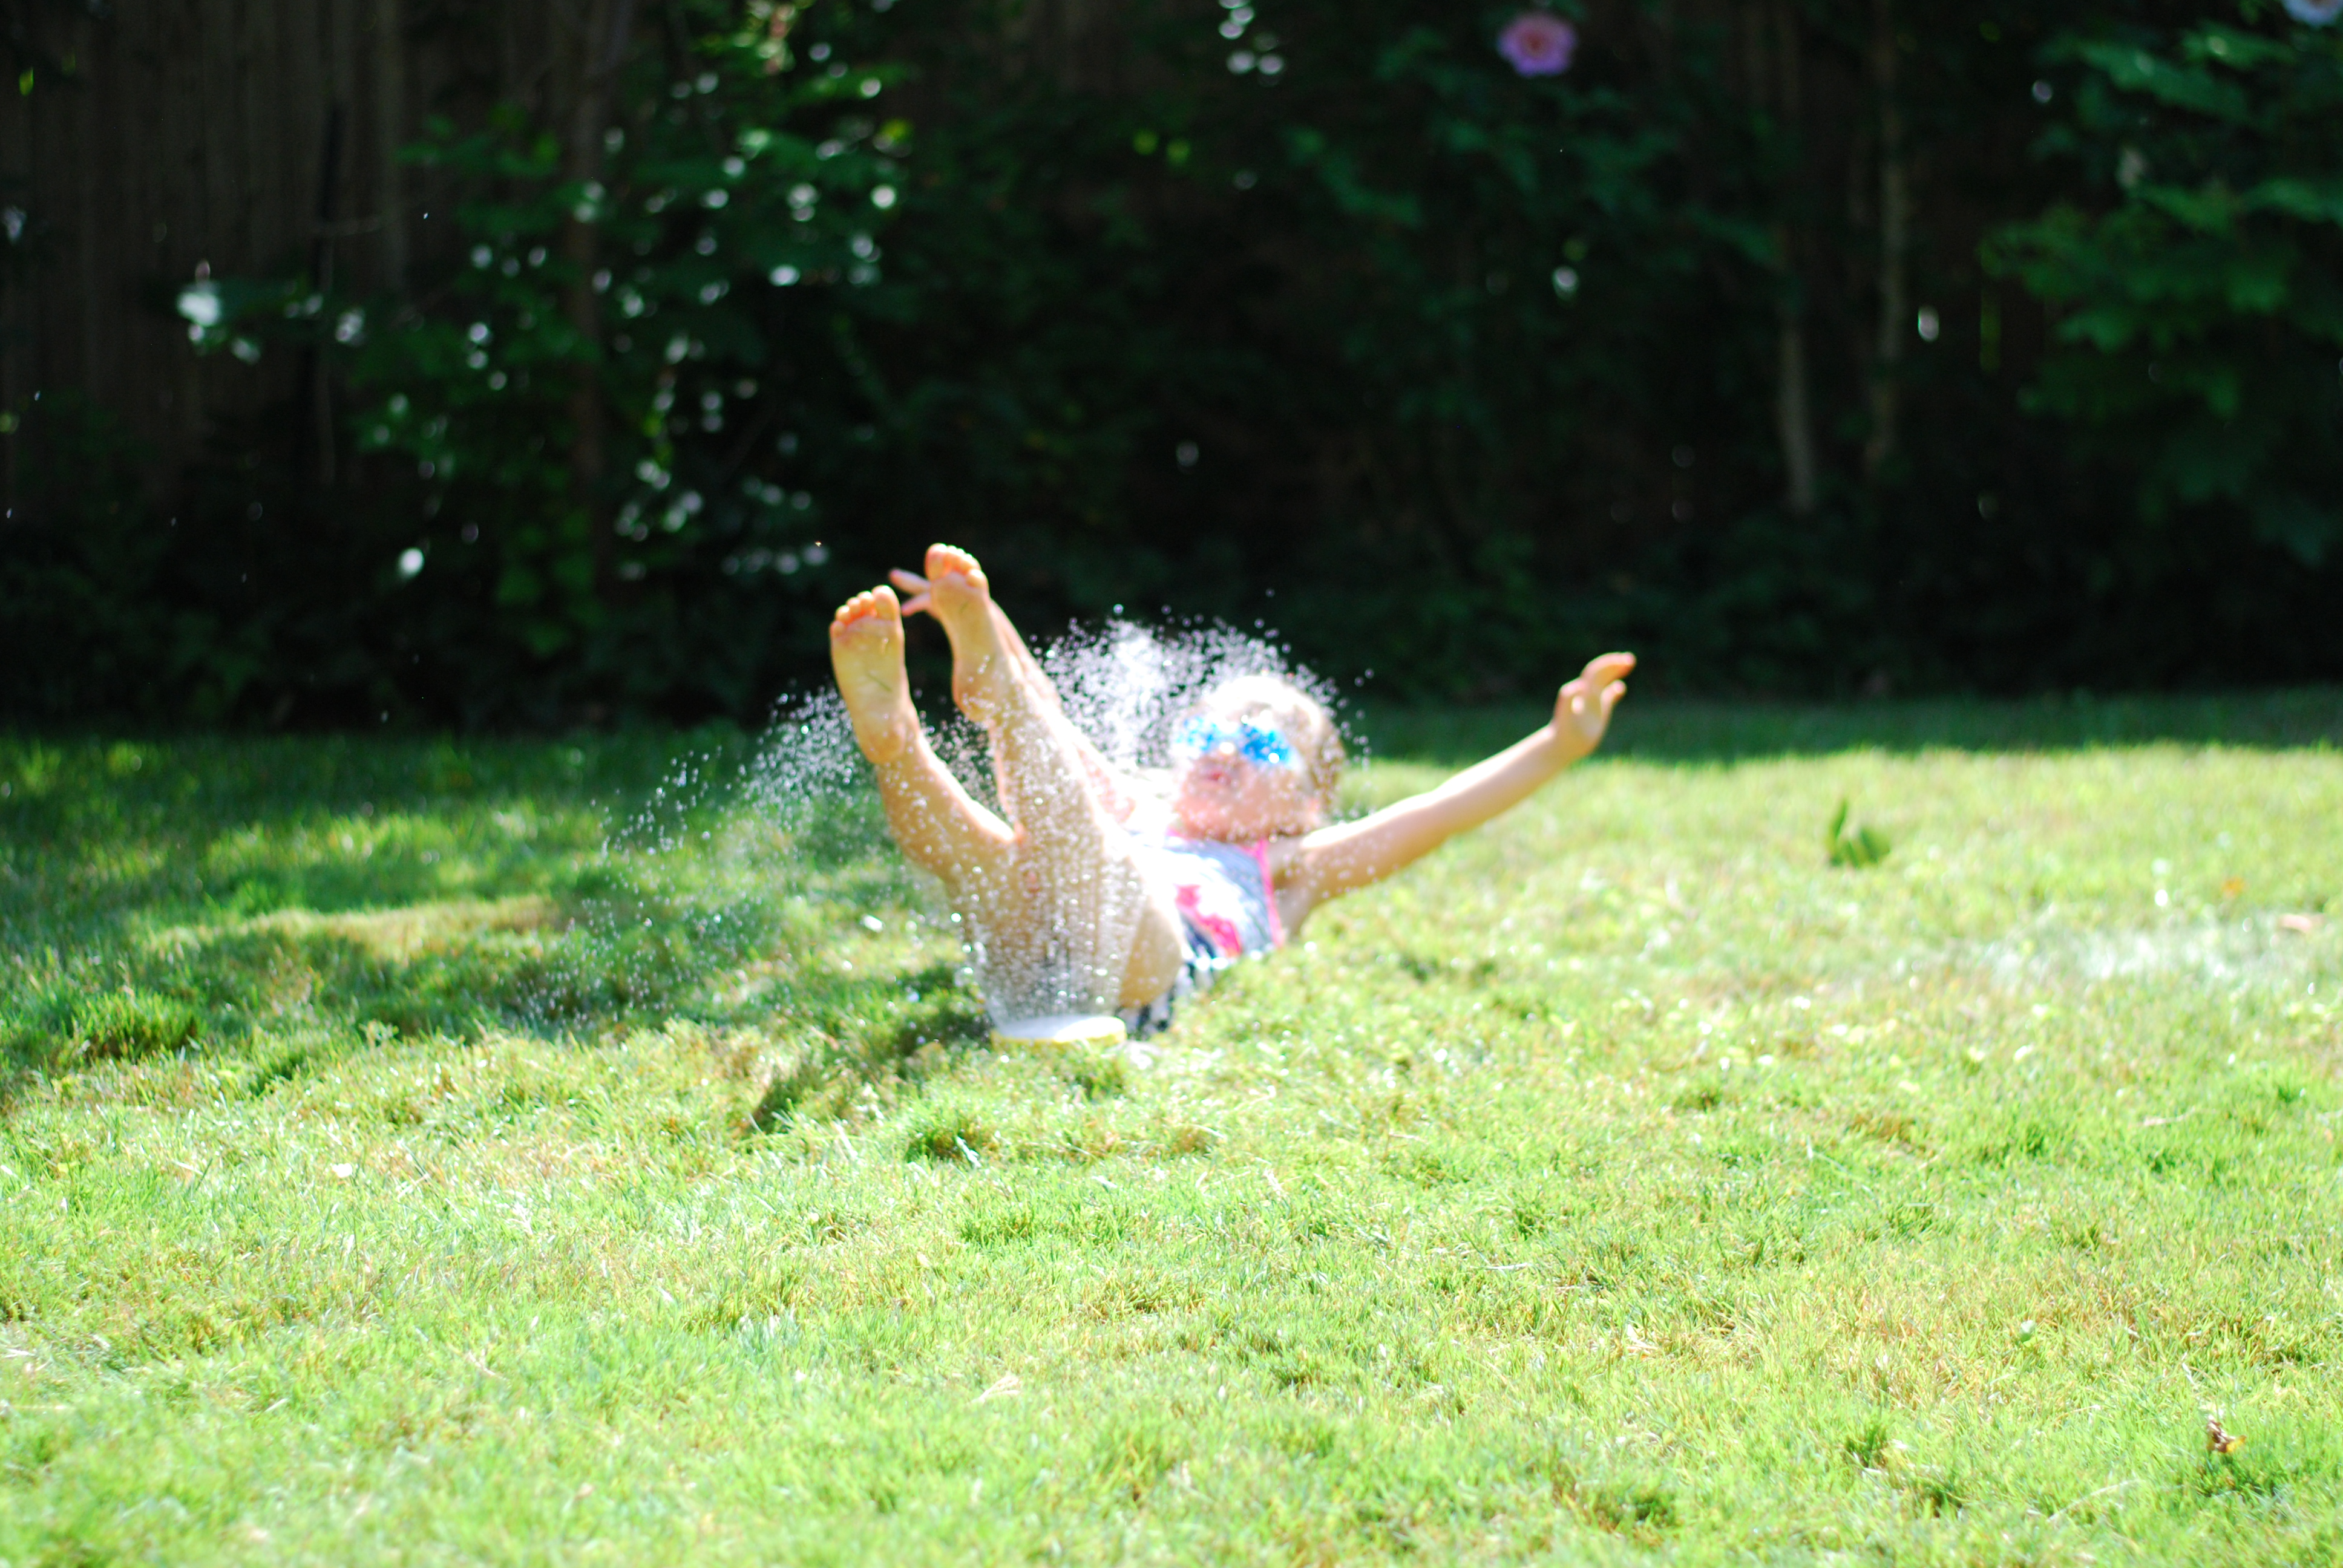

Summer time and sprinklers….and blue goggles. Doesn’t get much better than that.
Because there can never be too many flowers…right?
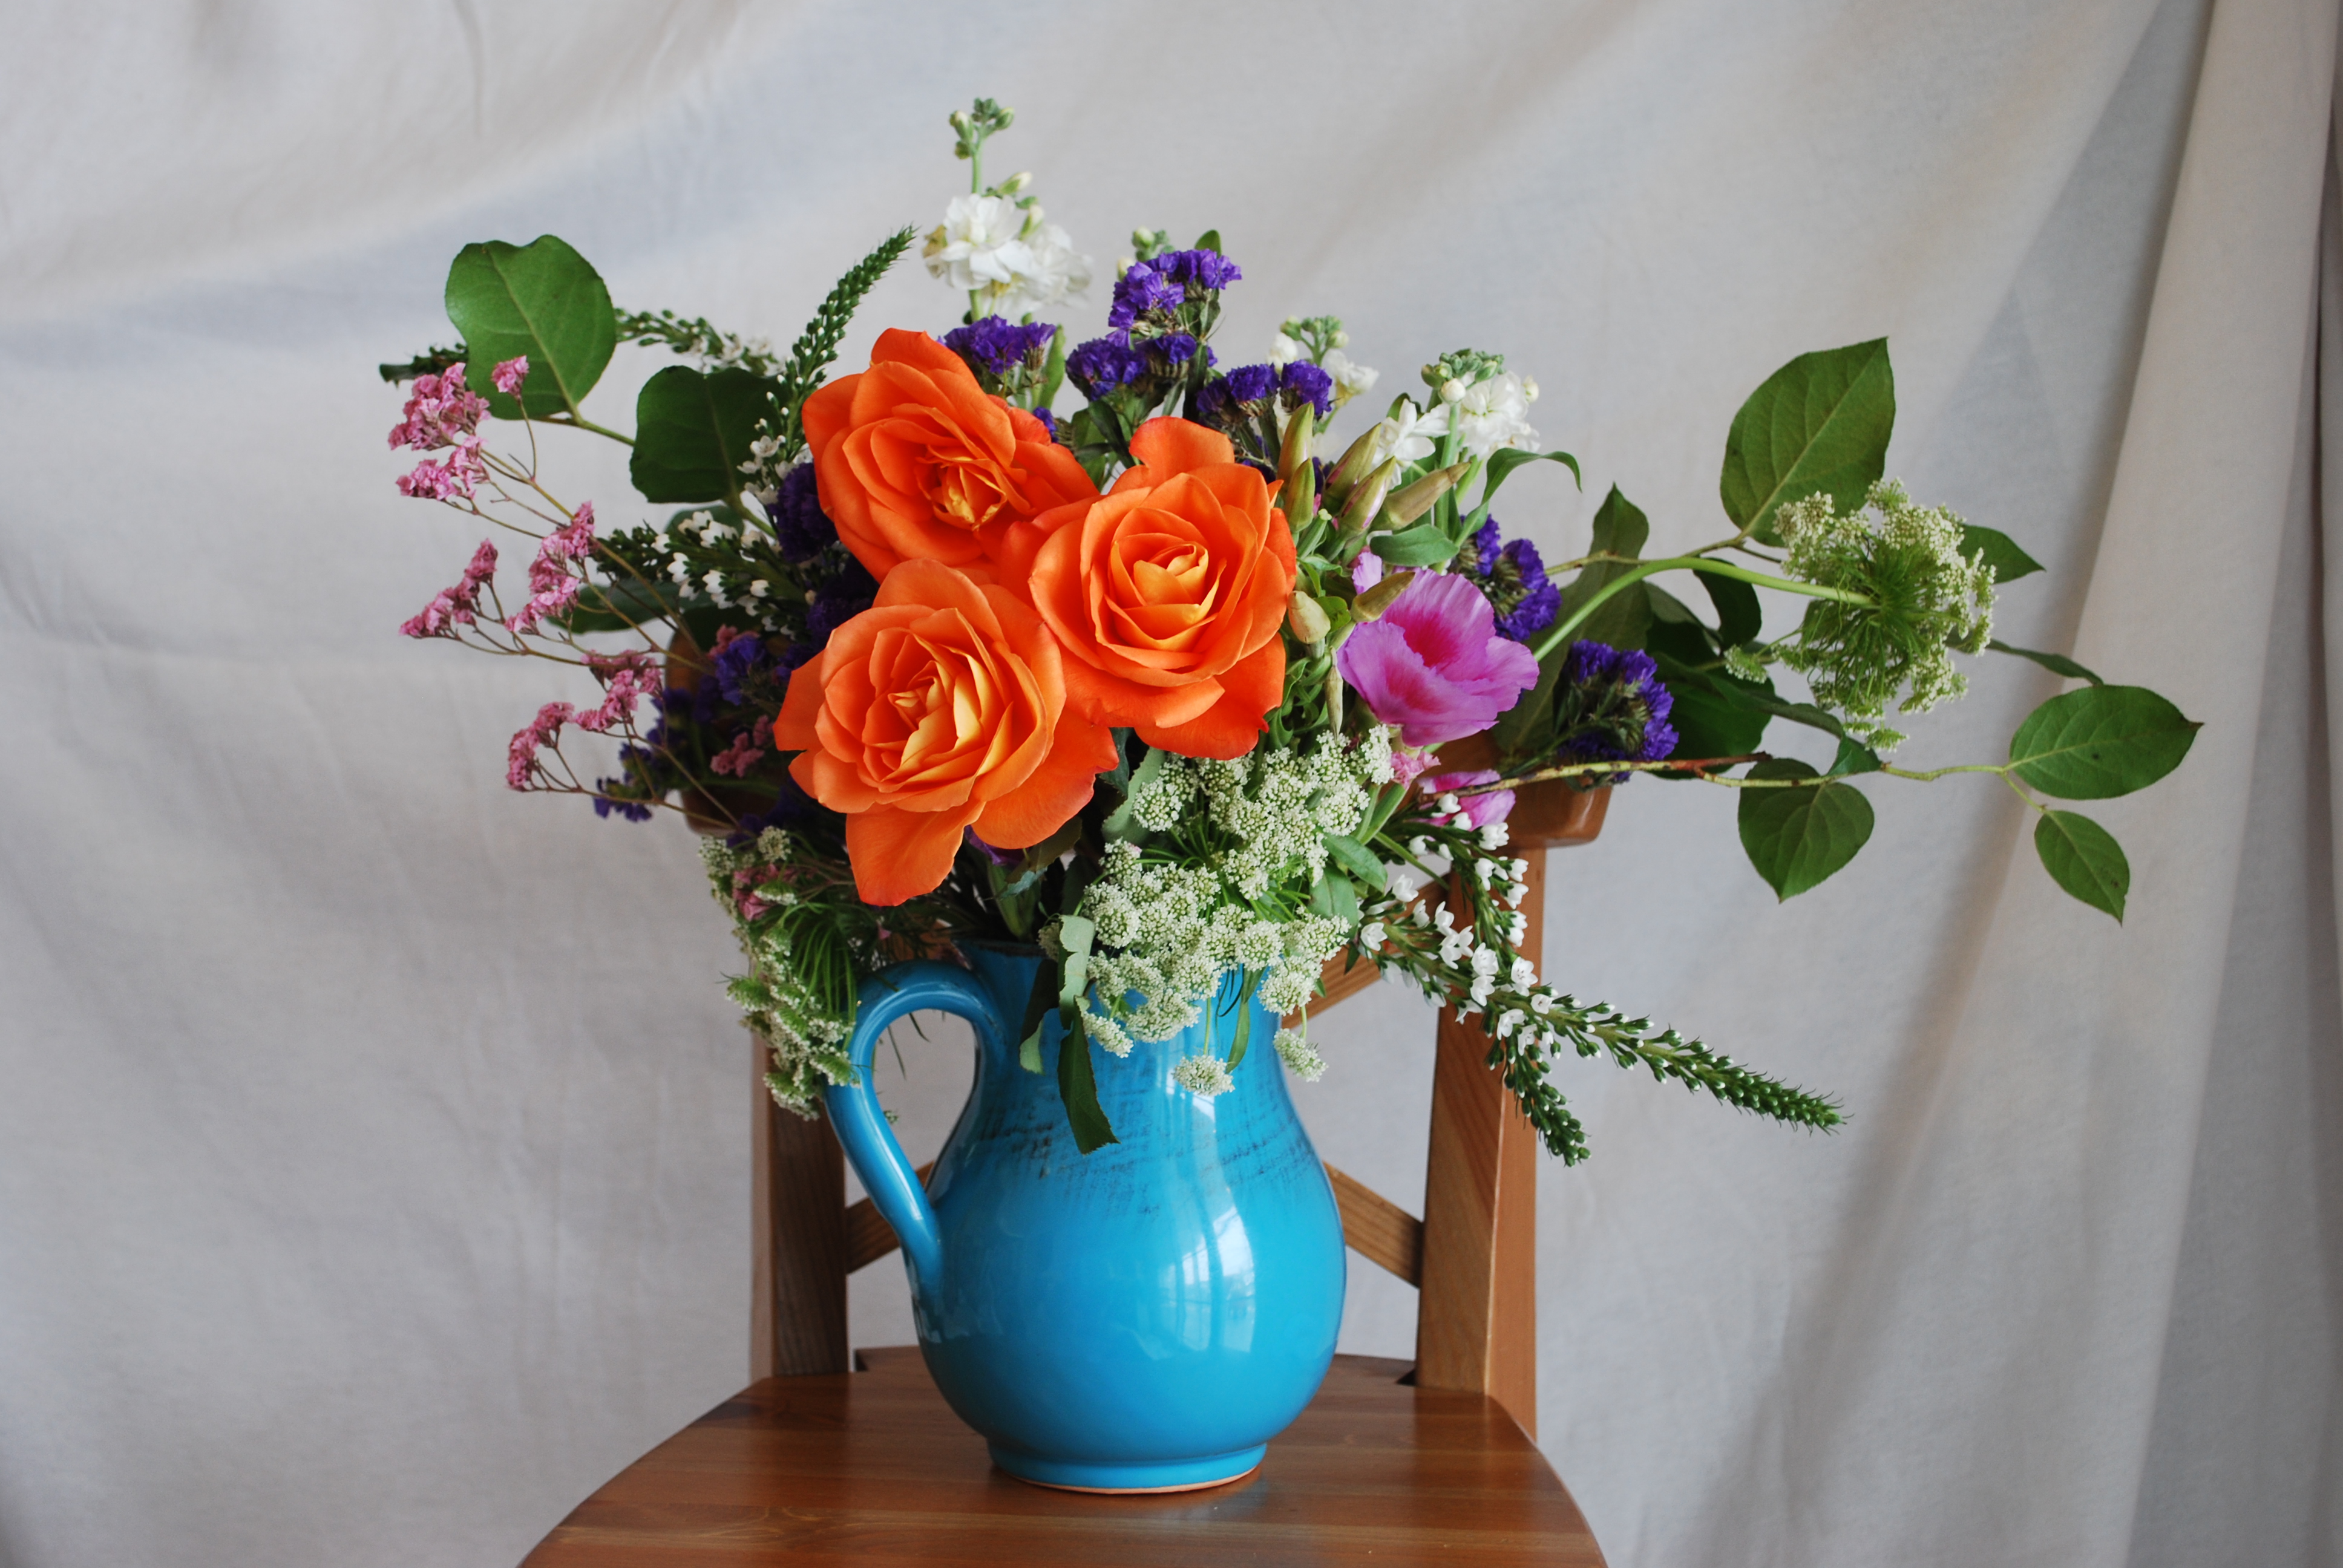


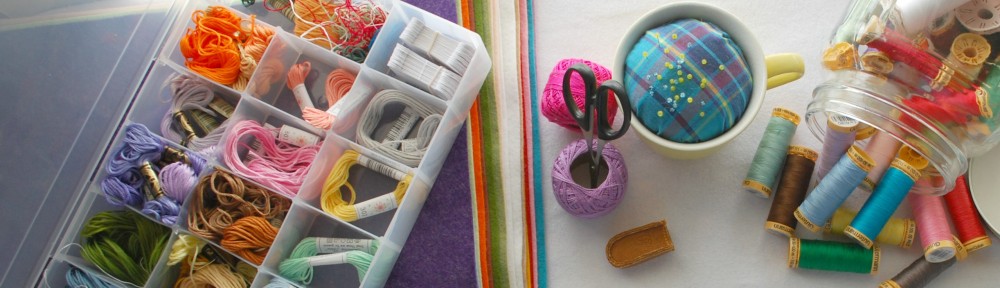
At 30 I’m finally pursuing some interests I’ve had since high school…and before. One of them is floral design/working with flowers. I’m taking an on-line class through Nicole’s Classes at the moment.
This week the assignment was an English Garden bouquet.
It is so much fun!!

Hello Strangers! (Or maybe I’ve been the stranger? Anyway…)

I’ve got a new pattern! Available on Craftsy and Etsy as a digital download!
I’m very excited because I’m finally making patterns the way I’ve always wanted to but was too afraid to try – by hand! Hand drawn, lettered and embellished – by me – all with simple tools like pens and paper! A novel idea, right? Doing something by hand! (That then becomes a digital download…but still, it’s about the best way I can figure out to do it for now!).
Now that I’ve got one under my belt, I think more are soon to follow. Taking the computer out of the process means I’m ENJOYING it SO much and just want to keep going!!! Yay!
Happy New Year!
Blessings – Daphne
It seems like an explanation of everything that’s happened over the last month and some would just be too much, so here are some random pictures! There are more I need to download from my phone, and when that will happen…who knows!
A few cards – these will be for sale along with a BUNCH of other stuff at a sale this weekend!

Costume for a friend’s son – he was super cute!
 Wait, is that our house??? A clean island??? Yep. Had to take a picture to document this rare occurrence!


More costumes, for my best friends girls. They looked SO cute at little Rockford Peaches! (If you don’t get the reference, it’s from A League of Their Own).


Some pumpkin patch fun!

Baby hat for a friend’s photography business. Really cute photo prop! Pattern can be found here: Oodles-4-Noodles.

Fun, sneaky learning games with ‘pumpkin day’ colored pom poms! Wyatt referred to Halloween this year, as Pumpkin Day after reading It’s Pumpkin Day Mouse!

And I did make a costume for my child as well! He was Buddy the dinosaur from Dinosaur Train. He liked it and wore it several times – I was so glad – he refused to wear his costume last year.
That’s all for now. More soon…hopefully! Blessings!
Sharing over at Military One Click today! 
Do ever feel like one of “those moms”? The ones that are always pulled together. They always have a diaper bag with them filled with diapers, extra clothes, bottles, a snack and maybe even some entertainment for older kids? I usually don’t feel like those moms. It seems very basic but even after 3 years of carting around baby stuff, I seem to frequently forget the diaper bag. Or if I do have it, it somehow doesn’t have any diapers in it, let alone extra clothes or entertainment. Is anyone else like this, or is it just me?
Well, we went to lunch a few weeks ago, and when we walked in the hostess handed my son a packet of crayons and a paper to color. A light bulb went off. Why don’t I have crayons in the diaper bag for occasions like this? Because they would be loose and probably fall out and be lost forever or melt all over the car. So, here is my solution. A crayon pouch!

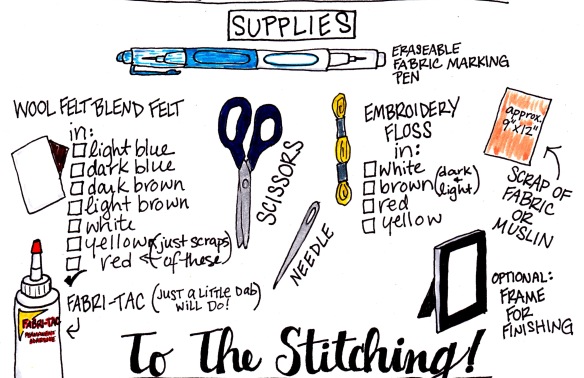
Supplies Needed:

1) piece of wool felt (10″ x 4″)
2) embroidery floss or thread to match felt
3) needle (or sewing machine)
4) scissors
5) hair tie
6) 4 crayons in your kiddos favorite colors!
7) marking pen (this one is specially made for fabric but a regular pencil or colored pencil would also work)
8) ruler
A note: If you’re doing this by hand (which I highly encourage!), lets leave our ‘perfectionist selves’ at the door, ok? Handmade is imperfect and that is a Beautiful thing – and all the more special for the little one you are making it for.
Let’s get started!

1) Fold up bottom edge of felt about 2 1/2″.

2) Mark 1/4″ from the left and right edges. Then mark a line 7/8″ from the left mark, then 7/8″ from the right line and then one in the middle of those (7/8″ from each line). Hopefully the picture will help make sense of all these words!

3) Sew up these lines (from the folded edge up) with a running stitch. Start with the middle line and work out to the edges.

4) When you get to the top of each line (the edge of the fold) be sure to go over the edge with a stitch to hold it down.

5) You can trim the top (un-sewn half) with pinking shears or regular scissors if you’d like.

6) Position the hair tie on the middle sewing line on the back of the pouch. Tack it down to this line of stitching with several stitches.

7) Add any ‘flair’ to the front flap you’d like.
8) Insert crayons. Wrap hair tie around pouch to secure.


Ta Da! You did it! Now, just don’t forget it the next time you’re heading out to dinner. 🙂
Happy Friday!
I was way behind on PL, then caught up, and I actually did a watercolor this morning to include with this weeks spread! Hooray!

Music Together started this week. If you have young children, I highly recommend it. Here’s a link: http://www.musictogether.com you can click on Class Locator to find a class near you!
Several PL spreads coming up next week. Have a great weekend!

It is so fun to receive mail from other creative ladies! Pretty packaging really makes me happy and if it’s a purchased item I am waaaaay more likely to go back to that seller. It’s something I do with my Etsy shop sales as well.
This bundle of lovely came in an order I made from Michelle Wooderson of Mish Mash.

Lots of raw materials to play with! So excited!
 I have a Ta-Dah for you today! The pegboard!!! It just needs a few little shelves to hold paint and patterns and then it will be complete.
 Here are the plans – by my wonderful husband. Drawn on a 2 x 4, of course. 😉

 The fellas are working hard!
 One panel complete! The whole thing is 4′ x 6′ – made up of three 2′ x 4′ sections.
 Wyatt helped me paint the trim. So glad the hubs suggested we paint it – I really like the accent it gives.

Late night hanging session.

Mid-way through operation ‘out of drawers and onto pegboard’.
 Changed the orientation of the table, added a chair I rescued after Hurricane Sandy and just now got around to painting (matches the pegboard!). Still have some work to do, but it’s so much better than it was and I LOVE the organization of the pegboard. Waaaay more than I was expecting to even! I will have a final Ta-Dah and go through each section of the board once it’s finished. Until then…
 THANK YOU Handsome! You’re the best! 😉
![]()
Somehow I have been given the opportunity to be a guest blogger at Military One Click! How cool is that?! If you are in the military, or know someone who is, this site is a must to bookmark. There is information about relocating, job support, education, military deals and discounts, a veterans section and much more. Seriously, everything all in one place!
I’ll be sharing some craft tutorials and ideas every so often. You can check out my first one here: Crafty Guest Blogger!
Beauty in the Ordinary
... making things
Making Spinsterhood Look Good....
Where handmade + imperfection is embraced
Where handmade + imperfection is embraced
Where handmade + imperfection is embraced
Just another WordPress.com site
Where handmade + imperfection is embraced
Where a Straight Line's a State of Mind
Where handmade + imperfection is embraced
Where handmade + imperfection is embraced
Where handmade + imperfection is embraced
Where handmade + imperfection is embraced
Where handmade + imperfection is embraced
Where handmade + imperfection is embraced
Where handmade + imperfection is embraced
Where handmade + imperfection is embraced
